Tuesday, December 3, 2019

Weekly Market Activity Report For Week Ending November 23, 2019

Residential new construction activity continues to rise nationally. The U.S. Commerce Department reports that new housing permits rose 5% in October to a new 12-year high of 1.46 million units. Lawrence Yun, the National Association of REALTORS® chief economist, called the latest figures “tremendously good news for the housing sector.” With builder sentiment and buyer activity remaining strong, it is widely expected that new construction will continue to remain brisk in the coming months.

In the Twin Cities region, for the week ending November 23: 
• New Listings increased 74.1% to 928
 • Pending Sales increased 39.8% to 966
 • Inventory decreased 6.6% to 10,724

For the month of October:
 • Median Sales Price increased 5.7% to $280,000
 • Days on Market decreased 4.2% to 46
 • Percent of Original List Price Received increased 0.1% to 98.1%
 • Months Supply of Homes For Sale decreased 4.0% to 2.4

Minneapolis Area Assosiciation of Realtors

Publish Date: December 2, 2019 • All comparisons are to 2018 All data from NorthstarMLS. Provided by Minneapolis Area REALTORS®. Report © 2019 ShowingTime.

Wednesday, November 27, 2019

Make A Move to End Hunger

Moving any time soon? Find out how the simple act of moving can help you feed a person in need.

Guest post by NorthStar Moving Co-Founder Laura McHolm
Did you know that in the United States, 1 in 7 children goes to bed hungry? Shocking right!? What can just one person do to tackle such a big problem? A simple click of a button or making a move can help out quite a bit! First thing you can do is go online and donate to your local food bank. Every little bit helps! It only costs $1 to provide four meals to a hungry child. Next, bring non-perishable food directly to your local food bank’s door.
If you are moving, it is the perfect opportunity to help feed hungry kids. The act of giving while you move will actually make your move easier and potentially help those in need. As you pack up your kitchen, don’t throw away those unexpired canned and dried goods, donate them! Save yourself some heavy lifting and shelf place in the new place. Sounds easy right? It gets better, you don’t even have to take the food down to your local food bank yourself!
Visit www.MoveForHunger.org, a non-profit organization that will connect you with a local moving company that will deliver your non-perishable food donations to your local food bank for you. Check out their Find A Mover tool and feel good about working with a moving company that gives back. It’s free and one less thing to pack.
Wondering if your food bank wants your three pound bottle of mustard? Here are the top items that they need:
  • Canned Vegetables & Fruits
  • Canned Stews & Soups
  • Canned Beans
  • Canned Tuna
  • Pasta & Sauce
  • Baby Food
  • Dry Beans
  • Flour
  • Cereal & Oatmeal
  • Juice
  • Rice
  • Peanut/Nut Butters & Jelly/Jams
Now that you have donated a box full of food to provide meals for hungry families, feeling the urge to help even more? Start your own food drive. It’s a great way to get your kids in the habit of giving. Simply ask local businesses, schools and libraries to put out your colorfully decorated food drive donation boxes and use your social networks to get the word out. If I can do it for seven years in a row with the “Let’s Send Hunger Packing” food drive, you can too. In fact, we have raised a total of approximately 134,124 meals! It only takes 1.2lbs of food to provide a meal to an individual in need, so it doesn’t matter how big your food drive is, every little bit helps. Together, we really can send hunger packing!

Laura McHolm is an organizational, moving & storage expert and co-founder of NorthStar Moving Company. NorthStar Moving Company is an award winning, “A+” rated company, which specializes in providing eco-luxury moving and storage services.

Originally posted by Coldwell Banker Blue Matter Blog

Wednesday, November 13, 2019

Get Thanksgiving Holiday Prep Started Early

Whether you’ll be hosting a family get-together or celebrating with friends, start planning now to ensure a stress- and disaster-free Turkey day.

Guest post by  Michelle Lee, Houzz
It’s time to pack up those spooky Halloween decorations and transition your home for the next fall holiday. Whether you’ll be hosting a family get-together or celebrating with friends, start planning now to ensure a stress- and disaster-free Turkey day. Here’s how to organize your party supplies and details for a beautiful feast this year.


Finalize Your Guest List

First things first, sit down with your friends and family to make a final decision on who you’ll be inviting over this year. Make and mail invitations now so your guests will have enough time to coordinate their own plans and get back with a timely RSVP.


Make a Menu or Hire a Caterer

Jot down recipes, shopping lists and cooking schedules today if you’re planning to make a home-cooked favorite or two this year. You’ll want to stock up on ingredients before your local grocery store sells out. If you’re not very kitchen-savvy, begin browsing local caterers’ menus before the best get booked.
While you’re at it, be sure to clear space in your pantry and fridge to hold the bounty of food before cooking day. If you have extra time, your oven and cookware supplies could probably use a nice cleaning.


Do a Walk-Through of Your Home

It’s important that you take your time as you pass through every room. Make note of anything unsightly that your guests might notice and take the next couple of weeks to fix scuffed paint spots, flickering lights or fraying furniture. Clear the coat closet and entryway, spruce up your post-feast lounging areas and prep guests rooms or kids’ areas as needed. Also take a good look at your dining space as you move on to the next tip.


Decide What You’ll Need to Rent or Buy

Can your dining room accommodate one long table for everyone or will you have to split up into two areas? Do you have enough chairs and table settings? Gather your own entertaining supplies and see if you can make-do or if you’ll need to buy or rent extras for this holiday season.


Plan Out Your Table(s)

This step is a bit early, but you can start visualizing the table or sketch it out on paper. Start planning an ideal seating chart, so couples aren’t awkwardly separated and family feuds aren’t reignited. You can make changes as RSVPs arrive.
Consider what your statement centerpiece will be this year as well as how you’ll be coordinating the plate settings and name cards to match. If you’re going with a nature-themed piece, it’s best to wait to order flowers now to prevent early wilting, but make sure to reserve one ahead of time with a local florist.


Start Decorating!

This is the most fun step of all and you can really let your style shine in any way you desire. Choose a general theme for the home and shop for matching decorations. Make sure you add some of this season’s classics, such as warm candles along the mantel or an inviting fall wreath on the front door.

Originally posted by Coldwell Banker Blue Matter Blog

Friday, November 8, 2019

20 White Kitchens That Look Like Design Heaven

A bright all-white kitchen can be a bit blinding and stark-especially a small one. Painting your cabinets a subtle neutral will maintain than the light and open feel of a white color scheme while bringing in dimension and personality.
All white is classic, but it can get blah, fast. Warm it up and add contrast without breaking out of the light color scheme with a cream and earth-toned rug. Leanne Ford also displayed earthy decor on the floating shelves to bring out the rug.
Hadley Mendelsohn Design Editor Hadley Mendelsohn is House Beautiful's design editor, and when she's not busy obsessing over all things decor-related, you can find her scouring vintage stores, reading, or stumbling about because she probably lost her glasses again.
industrial kitchen

Wednesday, November 6, 2019

How to Pack Your Garage In Five Steps

Packing up a garage when moving can feel like a chore. With a little planning, packing up your garage will ease your mind and possibly fill your wallet! Here are some tips on how to tackle the job.

Guest post by NorthStar Moving Co-Founder Laura McHolm
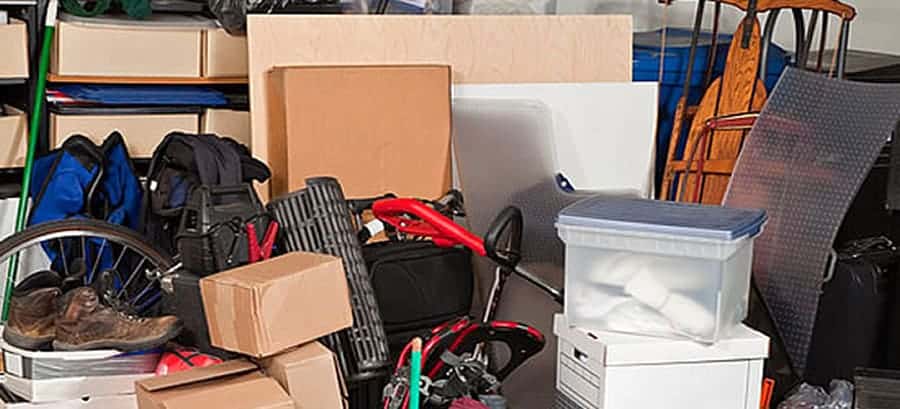
When it comes to packing up your home for a move, the garage is often the last room packed. Let’s face it, we put it off due to the sheer number of things piled up over the years. Garages are full of tools, landscaping equipment and things you don’t want to look at. Often, our garages have become the dumping ground of junk we don’t want in the house. But…there are so many advantages to making the garage the first room you pack up. With a little planning, packing up your garage will ease your mind and possibly fill your wallet! So, how do you tackle packing a garage?
#1: Sort and have a garage sale!
Moving is the time when the garage finally gets cleaned out. Hurray! It doesn’t make much sense to move belongings you have no intention of ever using at the new place. Now is the time to get rid of what you really don’t need: the stroller for your now 10 year-old; the growing collection of sport teams t-shirts; tools never used; etc. But, don’t just toss them out… sell or donate them. If you have the time, a garage sale is a great way to de-clutter and get some extra cash in your pocket.
First, sort items by creating two sections in your garage: one section for the things you are taking with you and one for the stuff you don’t want or need anymore. Then price and tag the unwanted items for your garage sale. The items that don’t sell can be donated. Donate clothing and household items to your local favorite charity such as Goodwill for someone else to enjoy. You can even donate your unwanted furniture to the Habitat for Humanity Restore. Getting rid of items will cut down on your moving expenses and keep your new garage space nice and a great place to get the rest of your house organized!
Image result for garage sale stock photo
#2: Get the right supplies
Get the right stuff for your stuff: the right boxes and supplies paired with the right packing methods are crucial in the success of your entire move. In the garage, most items are heavy and oddly shaped. Be sure to have the following on hand:
– Boxes: Sturdy, recyclable cardboard boxes of various sizes.
– Eco-bubble wrap: Use biodegradable eco-bubble wrap to protect items.
– Packing Tape: Every box needs to be taped, top and bottom, with 2 – 2 1/2 inch gummed or masking tape to give it additional strength and prevent opening, so you’ll need approximately one roll of tape for every 15 to 20 boxes. Run multiple strips of tape along the bottom of the box in both directions to make sure the box stays secure.
– Packing Paper:While ordinary newspaper works fine for some purposes, be aware that the paper’s print will run giving you an extra cleaning task at your new home.
– Blankets:Your mover can provide you with moving blankets for large items.
Tip: Before you start placing your garage belongings into the moving boxes make sure you have secured the boxes bottoms with several layers of packing tape for added protection. Correctly packed boxes paired with the correct moving supplies keep your items safe during storage and transport.
#3: What not pack
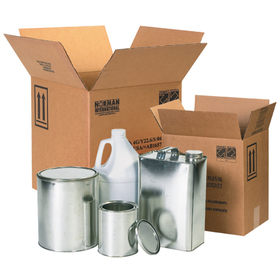
Most garages have hazardous materials that can’t be moved due to safety reasons. Common sense and the law forbids moving companies from moving flammable items such as aerosol cans, paints, gasoline, paint and paint thinners, charcoal, propane tanks, fertilizers, pesticides, chemicals, cleaning supplies, etc. Be sure to properly dispose of these items before your move.
Image result for hazardous materials stock photo
#4: How to pack garage items
– Leave smaller hand tools such as screwdrivers, wrenches, pliers, hammers, etc. in your toolbox and close securely.
– Wrap any items with sharp blades with a few layers of eco-bubble.
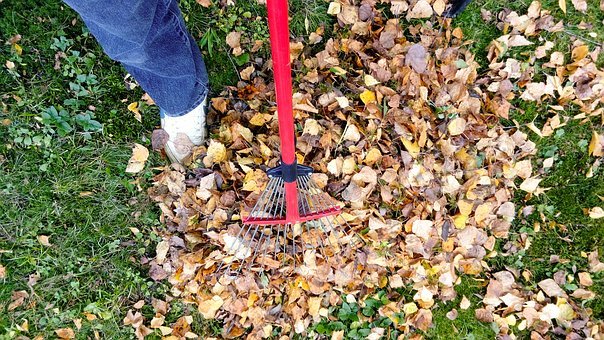
– Bundle large garden tools such shovels and rakes together with tape or rope and wrap them with a large moving blanket.
– Preferably pack power tools in their original container. Remove any detachable parts a tool may have, including the batteries, and pack them in the same box.
– Gas operated machinery such as lawn mowers and chain saws must be emptied of their fuel before they are moved.
– Stack outdoor chairs and disassemble other outdoor furniture when possible. Remove cushions and pack them in boxes.
– Wrap fragile flowerpots in eco-bubble. However, keep in mind moving companies cannot move plants across state lines. And your plants won’t survive in storage.
– Clean, defrost and dry: refrigerators and freezers. Wrap them with moving blankets for protection.
– Dissemble bikes as much as you can before the movers get there, remove the handlebars and wheels. If you can, it is best to go to a local bike store and look for an original bike box and use it to pack the bike.
– If a grill is equipped with a propane tank it cannot be moved even if it is empty. And, you cannot move charcoal either. Best to give them away to neighbors. Remove the entire propane tank and the charcoal before you move just the grill.
#5: Label, Label!
Remember that memory card game? It’s hard to find those two matching elephants in rows and rows of cards. Label each box with what contents are on the inside and write the location where this box is going: “Habitat for Humanity Restore” or “GARAGE” and  remember to write “FRAGILE” when needed.
While the garage is often the last room packed in a home, make it your first. It takes a lot of time; from sorting, dealing with odd shaped tricky items to packing and donating. So start early and ask for help! You can also use that empty garage space for moving items out of each room and sorting. Repeat the above steps for each room. Wishing you a stress free move!
Related image

Originally posted by Coldwell Banker Blue Matter Blog

Friday, November 1, 2019

5 Things to Do to Your Grass This Fall

Fall is the best time for lawn care, so when it comes to planning your autumn projects, add these to the list.

By the time fall comes along, and you’ve tended to your grass every single week, pleasant springtime memories of fresh-mown grass smell have long passed. Still, you must get the yard grass ready for winter, especially if you’re planning to put the house up for sale next spring. Fall is the best time for lawn care, so when it comes to planning your autumn projects, add these to the list.

1. Adjust the Lawn Mower Blade

When cutting the grass in late September or early October, set the mowing blades a bit shorter than usual. Lower the blade to the shortest recommended height for your variety of grass. That will help keep grass from matting underneath winter snow, but the turf will be high enough for the roots to stay firmly planted in the soil. Preventing thatch and matting allows snow-covered grass to remain healthy, and leads to a thick, full lawn in March, April, and May.

2. Fertilize

The leaves are changing, and that means it’s time to fertilize the grass. If you haven’t done it this year, test the soil to determine its acidic balance; this lets you know what type of fertilizer to use. The pH scale is from 0 to 14; anything less than 7.0 is acid, and anything above 7.0 is considered alkaline. Whether you choose soil amendmentsorganic, or chemical fertilizers, they must be the proper types for the grass in your yard.  Buy a soil testing kit or contact your local cooperative extension service.

3. Aerate

Speaking of soil, it needs to breathe. Soil compaction occurs in areas where kids are playing, dogs are running, riding lawn mowers are sitting — you get the idea. Compacted soil stops air and water from reaching the roots. (Even those squirmy earthworms can’t get very far!) Fertilizer won’t soak in very well. In short, compacted soil is bad for grass.
Aerating the lawn provides air that lets grassroots thrive. You can do it yourself by hand, but really, the best way to aerate the yard, especially a large one, is to hire a landscaper with the right kind of equipment. Hundreds to thousands of small, cork-like plugs of dirt are removed from the ground, allowing the grass to spread, thicken and breathe.

4. Reseed

The type of grass and condition it’s in determine reseeding requirements, but in any case, this project is better for autumn than in spring.  September is ideal for overseeding cool-season and warm-season grasses. If you live in an area prone to snow, you’ll want to reseed the entire lawn before the first frost. For warmer climates, reseeding the dead and bare patches should bring a nice green carpet, come springtime.

5. Weed Control

The first thing to remember is that weeds will never completely go away, so don’t make yourself crazy over it. But you can control the first outset in spring by applying a pre-emergent herbicide in the fall. It can give you a head start on next spring’s weed-reducing efforts. Follow directions carefully.
As if this weren’t enough, here are a couple more autumn yard projects for you.  Rake and remove fallen leaves so they won’t create a thick mat that will suffocate your lawn over the winter. Continue to water the lawn if you’re not seeing enough rainfall — if it hasn’t entered dormancy, grass should get an inch of water per week.
One thing to note: If you start a project too late in the season, your efforts are wasted. The grassroots will need time to absorb the nutrients from fertilizer. Tender plant seedlings from reseeding won’t survive the cooler temperatures. For a healthy lawn in spring, develop a fall schedule, and stick to it.
Originally posted by Coldwell Banker Blue Matter Blog

Wednesday, October 30, 2019

4 Easy Ways to Get Your Home Ready for Fall

With the dog days of summer in our rearview mirror, it's time to embrace all that fall has to offer-vibrant leaves, crisp apples, chunky knits, a piping hot cup of cider. There's a definite shift in our interiors as well, with windows closed up and darker hours descending. And if you work a nine-to-five, chances are the sun is setting by the time you call it a day.

Thankfully, there are some easy steps you can take to give your home a refreshing makeover for fall. The key, according to Havenly interior designer Annie Mueller, is to create a foundation that lends itself to new layers with each season. Depending on your tastes, this can mean starting with softer hues like beige and gray or a high-low contrast in shades of black and white. Those who favor the bold might prefer a mix of vibrant colors and patterns for an eclectic foundation.

"If you're unsure of where to start, try sticking to a neutral palette for your larger pieces," she explains. "Doing this will ensure you're not pigeon-holed to a specific color story and allow you the flexibility to go bolder with your accessories if you're so inclined."

With this clean slate, follow her genius tips to make your home cozier than a pumpkin spice latte.

Add Seasonal Touches in Moderation

For autumnal decor that is both festive and sophisticated, Mueller says less is more.

"Add a mix of mums and pumpkins to your front porch, making sure to include a variety of widths and heights for interest," she notes. "A unique arrangement in your dining room or living room can give your space all the cozy fall vibes without being overwhelming"

The interior designer recommends starting with some greenery, layering in flowers, and injecting a pop of metallics in gold, silver or rose gold.

Layer Textural Pillows and Throws

Fall is the best time to cuddle up on the sofa and binge-watch your favorite show. Up the cozy factor by adding extra throw blankets in chunky knits, Mueller says. Then, add pillows with textures like velvet, mohair, or faux fur.

"For a modern edge, keep your palette monochromatic," she says. "Or mix colors and patterns like buffalo checkplaid or ticking stripe for a more traditional approach."

Calling all plant lovers: You have our permission to add more greens to your home. (Those plants won't last on the porch once the temperatures drop, anyway.) Mueller loves fiddle-leaf figs, eucalyptus branches, and orchids.

Don't have a green thumb? Don't worry. Try some brighter artwork you might not hang year-round, for example. Mueller says easels make a smart, non-permanent installation.

Create a Signature Home Scent

We all love a good pumpkin candle, but there's a better way to inhale scents of the season without worrying about potential toxins. Mueller is all for a stovetop potpourri.

"Include anything from apples or oranges to cinnamon sticks, vanilla, cloves, pine needles, anise or lemon peels," she recommends. "Add any combo of the above ingredients with water in a pot, let simmer, and breathe in that intoxicating scent of autumn."

But, as Ina Garten always says, store-bought is also fine. If you're on the search for a streamlined scent, purchase pre-packaged potpourri or create a candle cocktail.

Originally published by Apartment Therapy and written by 

Monday, October 28, 2019

Weekly Market Activity Report For Week Ending October 19, 2019

While the U.S. Commerce Department reported that total housing starts dropped 9.4% month over month in September, that drop was focused on the apartment and condo segment while single-family housing starts actually rose .3%. Throughout much of the country, the continued low level of housing inventory is constraining sales activity from where it would be in a balanced market. Active inventory is in its normal seasonal decline, leaving buyers with fewer choices as we move towards the end of the year.

In the Twin Cities region, for the week ending October 19:
• New Listings decreased 6.1% to 1,309
• Pending Sales increased 6.5% to 1,138
• Inventory decreased 3.7% to 12,440

For the month of September:
• Median Sales Price increased 6.6% to $279,250
• Days on Market increased 2.4% to 43
• Percent of Original List Price Received increased 0.1% to 98.5%
• Months Supply of Homes For Sale decreased 3.7% to 2.6

Minneapolis Area Assosiciation of Realtors

All data from NorthstarMLS. Provided by Minneapolis Area REALTORS®. Report © 2019 ShowingTime.

Wednesday, July 24, 2019

5 New Homeowner Mistakes You Can Easily Avoid (And How to Avoid Them)

The following is a guest post from Jessica Thiefels
Become a first-time homeowner is one of the most exciting and stressful times of your life, even after the closing papers have been signed and key is in hand. Suddenly, you’re faced with a whole new set of challenges: how to manage a home that’s yours, not your landlord’s. There are a lot of opportunities to learn—and as you learn, mistakes will be made.
Luckily, many new homeowner mistakes can be easily avoided with a little preparation. Don’t let the following potential mistakes damper your excitement. Instead, plan ahead and keep these tips and tricks in mind as you learn the ropes of being a homeowner.
Ignoring Routine Maintenance
You likely just did a walk-through with a licensed inspector during the homebuying process, so you’re aware of what issues need attention and which can wait. That’s not where home maintenance stops. Home maintenance includes tasks you may have never thought of before, like cleaning the gutters, power-washing the house, prepping your pipes for winter and much more.
The best way to avoid missing these critical tasks, which could lead to costly damage, is to set up a quarterly or monthly maintenance schedule for all of the areas of your home. This should include indoor and outdoor maintenance as well as details like plumbing and electrical. Use this checklist from Better Homes and Gardens as a starting point to creating one that’s specific to your home’s unique needs.
Not Budgeting for Additional Expenses
Moving can be expensive but any veteran homeowner will tell you that there’s always more to budget for—and these issues seem to pop-up out of nowhere, like a broken washer right after you need to patch a leak in the roof. Plan for the unexpected by putting away extra money for emergency house needs.
Experts at HGTV suggest putting away 1 to 3 percent of your home’s purchase price each year to develop an emergency fund. They give the example, “For example, if your home cost $300,000, set aside at least $3,000 each year. Make one large deposit or spread the amount out in monthly deposits.”
Getting Locked Out
Being a new homeowner can make you more susceptible to being locked out: you have the new keys, you run out to get something and realize that the new key isn’t on your old keyring. You walk outside with the trash, forgetting that the new door locks behind you.
This mistake can lead to another one: choosing a locksmith that’s not reputable. In your hurry to get back into the house, it’s easy to forget to do your research and listen for clues that something’s not right.
That’s why experts from Lokology Locksmith share an important tip, “Ask the locksmith for an estimate prior to their arrival. If the locksmith cannot give you a quote or a price range over the phone—that should be a red flag.” This is a simple way to test whether a company is reputable to reinforce the quick research you did.
Making Major Renovations Right Away
It’s exciting to think about how you’ll make your new home feel more like yours with renovation projects. While small changes are to be expected, major renovations should wait. Give yourself time to live in the home, see how it feels, and determine what larger renovations will look like as needs arise.
For example, you may find the location of your fridge makes it hard to move around the kitchen seamlessly. This might be a focus of your kitchen renovation that would have otherwise not been considered.
Making Major Life Changes at the Same Time
 As you can see, becoming a first-time homeowner is a lot of work. Adding to that by having a baby or getting married at the same time only increases the likelihood that you’ll make mistakes or become overly stressed. If possible, leave yourself time to get to know what it’s like to be a homeowner and avoid making costly mistakes that come with being stressed, and in-turn, overlooking simple details.
Avoid New Homeowner Mistakes
There are some mistakes you can’t avoid—but many others that you can. As you get familiar with your role as a homeowner, keep these simple mistakes in mind. If you plan ahead as best you can, you’ll be able to enjoy all the excitement of owning your first home with less stress and frustration.

Originally posted by Coldwell Banker Blue Matter 

Wednesday, July 17, 2019

6 Tips for Summer Lawn Care

Don’t you hate it when the grass is greener at your next door neighbor’s place? Follow these tips to manifest the lawn of your life.

Don’t you hate it when the grass is greener at your next door neighbor’s place? This summer you could have the lawn that turns everyone’s eyes green with envy and admiration, but you’ve got to get on it right now! Follow these tips to manifest the lawn of your life.

BEFORE SUMMER

1. Inspect

Inspect your lawn and note any spots that need special attention. If you notice brown patches, you need to act quickly to identify the disease so you can treat it. If the entire lawn is somewhat flattened from winter weather, call in an aeration service. Those little holes in the lawn will last just long enough to loosen up the soil and allow better water and nutrient absorption.

2. Rake

Rake any dead spots and reseed using a variety of grass seed to match the rest of your lawn. For larger areas that may have been damaged by snow plows, for example, you can remove entire sections and replace with sod. If you notice areas where there has been a lot of soil erosion, mulch beds are a good way to shore up future runoffs.

3. Fertilize

Apply a slow-release fertilizer to feed the grass over weeks. Pick a day that’s not windy and check to make sure there’s no rain in the immediate forecast to keep the fertilizer where you want it. Dispose of any leftover fertilizer appropriately, as you would household chemicals like paint.

DURING SUMMER

4. Water

Make sure to water deeply, not daily. Deep watering will encourage a healthy root system. Whether you drag the hose out in the morning or have an automatic sprinkler system, set a watering schedule. Your lawn needs an inch to an inch and a half of water a week.

5. Lawnmower Maintenace

Keep mower blades sharp and balanced for clean cuts, and change the pattern every time you mow so grass blades will stand up straight. Remember to let your grass clippings fall where they may, and remain there. “Grasscycling” returns nutrients to the soil, allowing them to fertilize the lawn.
Proper lawn care prevents the most common lawn problems from getting out of control. Keeping the grass at the right length will help keep it healthy and keep weeds at bay.

AFTER SUMMER

6. Rake & Weed

When autumn arrives, and the leaves begin to fall, don’t wait for large amounts to pile up. Remove leaves often, so they don’t get a chance to become wet and sticky. Blankets of wet leaves can create a fungal problem that will plague your lawn long after the last snow falls.
Set yourself up for another lovely lawn the following spring and summer by doing some weed control now, and an application of fertilizer for nutrients to feed your grass throughout the cold season.
Keep in mind, if you plan to sell your home, having a nice lawn is crucial. But the homes that show the best have more than just end-to-end grass. According to a recent survey in Turf Magazine, the landscapes that have the best value are those with “a sophisticated design with large deciduous, evergreen and annual color plants and colored hardscape.” The right shade trees will also protect your lawn and keep your house cooler this summer.
Notice summer lawn care doesn’t just cover June through September. By preparing your lawn well in advance of the summer heat, you’ll have a yard that will withstand the stress of summer and thrive through the fall.
Originally posted by Coldwell Banker Blue Matter and written by